
By following the steps outlined below, you'll be able to register your MPS Monitor server in PrintReleaf, set up data synchronization, and connect a customer account
Part I: Adding Your MPS Monitor Server to PrintReleaf
1. Login to your PrintReleaf Dashboard and Navigate to 'Integrations' tab

2. Setup MPS Monitor Server: click 'Add Server' 
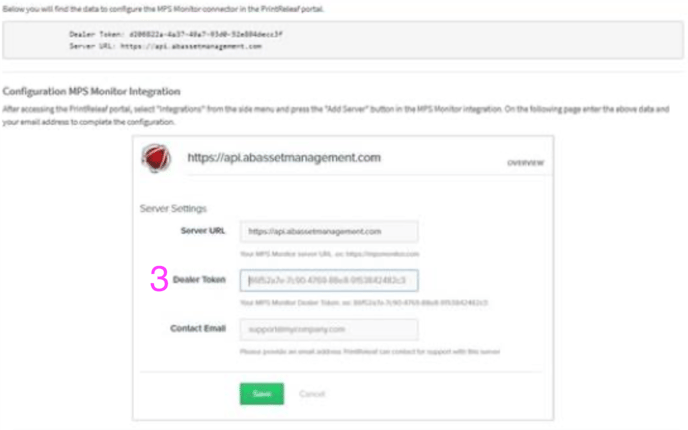
3. Enter The URL, Username, Dealer Token and Contact Email for Your MPS Monitor Account and Server and click 'Continue'

Part II: Enabling PrintReleaf on MPS Monitor

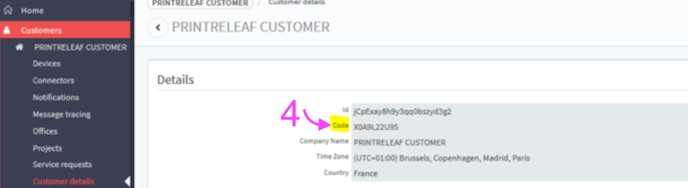
4. Copy Customer Code, you will need this later to complete a Customer Account into PrintReleaf
Part III: Adding MPS Monitor Feed to Client Account
1. Return to your PrintReleaf Dashboard and navigate to Accounts 
2. Click 'Add Account' button

3. Input your preferred Account Name and click 'Continue'

4. Scroll Down to Add Automatic Data Feed and Click 'Add Feed' under MPS Monitor

5. Add MPS Monitor Customer Code, set Activation Date, set Sync Settings, click Save to complete
You can set the Activation Date to import historical print data for retroactively offsetting paper volume. Often times customers wish to jumpstart their sustainable printing initiative this way.
You also have the option to sync all devices or only those with MPS Monitor managed, giving you flexibility in selecting which devices to include in the PrintReleaf synchronization process.
If challenges arise, the PrintReleaf Support team is readily available to assist.